Friday, May 16, 2014

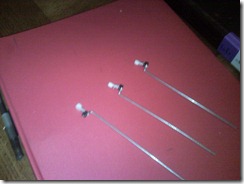
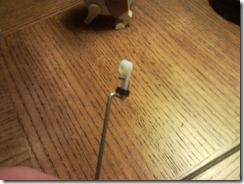
How to fix a "clogged" Makerbot SmartExtruder (5th Gen)

We've had the Makerbot 5th gen in our makerspace for about 6 weeks now, and we are about to receive our third "Smart Extruder" from MBI. After about two weeks it wouldn't take filament and wouldn't print...seemed clogged. Not wanting to void the warranty on our shiney new toy, we played nice and sent the old one in and they sent us a new one. Here we are a few weeks later and it was clogged again.

This time, however, MBI told us to keep the clogged one and they'd send us a new one anyway. I guess they figured the maker community would eventually figure out how to fix them, and then someone would post about it and maybe MBI could leverage that for a more permanent solution. Well, here you go.

Without any further introduction, here it is.

How to fix a "clogged" SmartExtruder on the Makerbot 5th Gen.

  1. Heat the extruder using the "Load Filament" command on the MakerBot.
  2. Once the stepper starts stepping, take the extruder off of the machine, and while it is still hot, use a 4mm wrench (I used an adjustable) to remove the nozzle from the extruder.
  3. Make sure your nozzle isn't clogged. If that is the problem, then you can clean it with a small gauge wire and a blowtorch. Ours wasn't really clogged, but I cleaned it up anyway. 
  4. Remove the fan shroud from the bottom of the extruder by lifting (gently) the tabs that hold it on. Mine came off pretty easily, You have to loosen all 4 tabs, then get a little space along the seam where the shroud touched the extruder body, then loosen the tabs again, and so on. You'll see what I mean when you get in there.
  5. Now, go ahead and use the same "Loosen, spread, loosen" routine on the plastic casing around the main extruder body. The housing should come off after 2-3 rounds of spreading. Be careful not to lose any parts as the lifter mechanism isn't really held in by anything but pressure. When you open it up the bearings and the lifter mechanism may fall out. I like to work on a table that is covered in carpet so if parts fall they don't bounce half-way across the room.
  6. Next, unscrew the heater body from the heatsink. To do this, you need to heat the heater-block with a torch for just a few seconds, then use really thin pliers or a narrow crescent wrench to unscrew the heatsink from the heater-block. The hex-head (nut)  is between the fins and the heaterblock. It won't unscrew when its cold.
  7. After you have off the heatsink, see if it has plastic in it. I used 22gauge wire to push out some hardened (glassified) plastic that was in the way. I had to heat the heatsink before pushing the wire through to soften the plastic. A couple seconds in front of a blow torch was plenty of heat.
  8. Once this side is clean, repeat the same process for the heater-block.
  9. Now that your heater-block and heatsink are clean, heat the heatsink bank up and screw it back into the heater-block.

  10. Carefully re-assemble the whole thing. To get everything in line, I put a piece of filament (6" or so) through the  assemble to hold everything straight while I lined up all the pieces and snapped it back together. Pull the filament out when you get it snapped back together.
  11. Now put the nozzle back on the heater-block by heating it up. I wouldn't try to screw it in while it was cold, I'm pretty sure it won't go. Just heat the aluminium heater-block, then the brass nozzle will go in very easily. You may have to heat the assembly again to get it all the way in. When it cools the threads become so tight I couldn't turn it with a wrench without thinking I was going to break something.
  12. Now, put the extruder back on the MakerBot, load up some filament using the on-screen tools, and you should be good to go.
For a detailed teardown of the extruder for curiosity sake, look here. They don't get into taking the nozzle off or taking the heater-block apart.

Hope this helps someone out there.

Happy Printing!


Monday, December 30, 2013

Installing Liferay 6.1.30 on JBoss EAP 6.1 on Windows (Part 2)

In my previous post, I showed you how to get JBoss EAP 6.1 running on a standard Windows 8 setup. We walked through downloading the prerequisites, installing them, configuring the java environment, configuring JBoss EAP, then finally creating an admin user and signing in the first time. This time, we will be tailoring JBoss EAP for Liferay 6.1.30EE, deploying the Liferay packages, and starting up Liferay using the default settings.

Part 0 - Prerequisites

As before, there are several things we need to download.

Part 1 - Installing Liferay's Dependencies

Your previously installed JBoss EAP home folder should contain a "modules" subfolder. Beneath this folder, you need to create three nested directories as follows:
$jboss/modules/com/liferay/portal/main
Once this has been created, extract the contents of the Liferay dependency archive to this folder.

Also copy over the sqljdbc4.jar file from the SQL Server JDBC 4.0 driver. If you installed it instead of extracting the SQL Server driver's contents, it will have been put here: <install path><sqljdbc_<version>\<language>\sqljdbc4.jar.

Next, you need to create a module.xml file in the same folder as the extracted dependency jar files and paste the following content into the file:
<?xml version="1.0"?>

<module xmlns="urn:jboss:module:1.0" name="com.liferay.portal">

    <resources>

       <resource-root path="sqljdbc4.jar" />
       <resource-root path="hsql.jar" />
       <resource-root path="portal-service.jar" />        <resource-root path="portlet.jar" />     </resources>     <dependencies>        <module name="javax.api" />        <module name="javax.mail.api" />        <module name="javax.servlet.api" />        <module name="javax.servlet.jsp.api" />        <module name="javax.transaction.api" />     </dependencies> </module>
Thats it. Your dependencies are now installed and referenced. Next up, we will need to make some changes to JBoss's configuration to work with Liferay.

Part 2 - Modifying JBoss

We will start off by modifying the JBoss standalone.xml configuration file. This file is in the $jboss\standalone\configuration\ folder.

Step 1 - Disable the default JBoss content & turn on JSP dev settings.

Find and disable the enable-welcome-root attribute in the virtual server section under the web subsystem, then add a configuration element to the section as indicated below:
        
<subsystem xmlns="urn:jboss:domain:web:1.4" default-virtual-server="default-host" native="false">
    <connector name="http" protocol="HTTP/1.1" scheme="http" socket-binding="http"/>
    <virtual-server name="default-host" enable-welcome-root="false">
        <alias name="localhost"/>
        <alias name="atlas"/>
    </virtual-server>
    <configuration>
        <jsp-configuration development="true" />
    </configuration>
</subsystem>

Step 2- Configure the Security Domain

Find the JAAS security subsystem element, and just before the </security-domains> closing tag, add the following:
<security-domain name="PortalRealm">
    <authentication>
       <login-module code="com.liferay.portal.security.jaas.PortalLoginModule" flag="required"/>
    </authentication>
</security-domain>

Part 3 - Deploying the Liferay WAR

For JBoss to deploy Liferay, you must extract and place the Liferay WAR package into the ROOT.war folder under the $jboss\standalone\deployments folder. If a ROOT.war folder doesn't already exist, create one and extract the contents of the liferay WAR package there.

If you are running the EE version of Liferay, you will also need to place the XML license file into the $jboss\..\deploy folder. This is the deploy folder one level UP from the JBoss home folder. If you are running the CE version, no license is required.

Finally, you should create a file called ROOT.war.dodeploy to indicate to JBoss that you want the contents of the ROOT.war folder deployed at runtime.

Part 3.5 - Configure Java Options (Optional for test installs)

If you are simply testing our the Liferay installation procedure and don't plan to use Liferay to accomplish anything, you can skip this step. If you intent to import documents, content, users, and do some useful work within Liferay, you should tweak some basic Java runtime settings to give the portal enough RAM to run reliably.

In the $jboss\bin folder, find standalone.conf.bat file and open it. edit the Java options near the bottom as follows:
rem # JVM memory allocation pool parameters - modify as appropriate.
set "JAVA_OPTS=-Xms1303M -Xmx1303M -XX:MaxPermSize=256M"

rem # Prefer IPv4
set "JAVA_OPTS=%JAVA_OPTS% -Dfile.encoding=UTF-8 -Djava.net.preferIPv4Stack=true -Duser.timezone=GMT"

Save your changes.

Part 4 - Starting Liferay for the first time

At this point, you've configured JBoss EAP 6.1, Installed the Liferay dependencies, extracted the Portal, indicated to JBoss you want it deployed, and possibly configured some JVM settings. At this time, you can start JBoss and let it deploy Liferay by running the standalone.bat file in the $jboss\bin\ folder.

After a few moments (it could take a couple minutes on an older machine), a browser window should open automatically to the address http://localhost:8080 and you will see the following screen.

You can leave the default settings alone to install Liferay using the Hypersonic (HSQL) database engine.

Congratulations, you've installed Liferay on JBoss EAP 6.1. In the next installment, we will create a Liferay portal database instance on SQL Server and configure Liferay to use it, then finalize our installation by cleaning up a few folders and performing some general housekeeping tasks.

Friday, December 13, 2013

Installing Liferay 6.1.30 on JBoss EAP 6.1 on Windows (Part 1)

Installing Liferay Portal 6.1.30EE under JBoss EAP 6.1.1 on Windows 8

I've been working on a project for a client implementing a new portal application to replace their aging WebSphere installation. The technology stack chosen was Java, SQL Server, JBoss EAP, IIS, Windows Server, and finally Liferay portal.
This is the first in a multi-part series on configuring Liferay to run within the environment described above.

Part 0 - Prerequisites

I am assuming you have a Windows 2008+ server (or Windows 7/8) and can comfortably install the prerequisites for running an application server and a portal. These pre-requisites include:

  • Windows O/S - I'll be using windows 8, but I've confirmed the steps are the same on Server 2008 & Server 2012
  • Java - I'm using Oracle JDK 1.7u40 64-bit version, I put my sdk in c:\java and the jre in c:\java\jre
  • Microsoft SQL Server - I'm using SQL 2012, 2008/2005 should work the same
  • IIS 7.5
  • Application Request Routing
  • You've set your JAVA_HOME and JAVA environment variables correctly.

Part 1 - JBoss EAP 6.1 on Windows

Just getting the application server running takes several steps. Since JBoss doesn't come with an "installer" we will be extracting the zip file and configuring the server by hand. It really isn't that hard.

Part 1.a Create Liferay home folder

Since Liferay prefers to run on a dedicated application server, the first step is to create your Liferay home folder. I'm using C:\Liferay\LiferayPortal6.1.30\ as my Liferay home folder. The reason for this is because I'm writing this using my workstation, and I will be installing Liferay portal 6.2.1 in another directory right beside my older Liferay install to test upgrade procedures. Your environment say be best suited by using a separate volume with only a folder "Liferay" in the root. I wouldn't recommend putting the liferay install directly on the root of a volume, but it should work that way in theory.

Create your liferay home folder:

C:
md C:\liferay\LiferayPortal6.1.30\
cd C:\liferay\LiferayPortal6.1.30\

Part 1.b "Install" JBoss

Extract the contents of the jboss-eap-6.1.1.zip folder to your newly created Liferay home folder. The Liferay home folder should have a single folder under it called jboss-eap-6.1. There really isn't anything else to getting JBoss "installed". *Note: I've found that the Windows Explorer built-in zip file handler is basically horrible. Use a decent extractor like 7-Zip to work with these archives.

Part 1.c Add Management User

Navigate to the jboss-eap-6.1\bin folder and use the add-user.bat script to create a new management user.
C:\Liferay\LiferayPortal6.1.30\jboss-eap-6.1\bin>add-user

What type of user do you wish to add?
 a) Management User (mgmt-users.properties)
 b) Application User (application-users.properties)
(a): a

Enter the details of the new user to add.
Realm (ManagementRealm) :(just press enter)
Username : jbharris
Password :
Re-enter Password :
About to add user 'jbharris' for realm 'ManagementRealm'
Is this correct yes/no? yes
Added user 'jbharris' to file 'C:\Liferay\LiferayPortal6.1.30\jboss-eap-6.1\standalone\configuration\mgmt-users.properties'
Added user 'jbharris' to file 'C:\Liferay\LiferayPortal6.1.30\jboss-eap-6.1\domain\configuration\mgmt-users.properties'
Is this new user going to be used for one AS process to connect to another AS process?
e.g. for a slave host controller connecting to the master or for a Remoting connection for server to server EJB calls.
yes/no? no
Press any key to continue . . .

C:\Liferay\LiferayPortal6.1.30\jboss-eap-6.1\bin>

Part 1.d Fire up JBoss

Now you can start your JBoss EAP 6.1 portal using the basic/standalone configuration. Run standalone.bat to fire up the server.
C:\Liferay\LiferayPortal6.1.30\jboss-eap-6.1\bin>standalone.bat
Calling "C:\Liferay\LiferayPortal6.1.30\jboss-eap-6.1\bin\standalone.conf.bat"
Setting JAVA property to 'c:\java\bin\java'
===============================================================================

  JBoss Bootstrap Environment

  JBOSS_HOME: C:\Liferay\LiferayPortal6.1.30\jboss-eap-6.1

  JAVA: c:\java\bin\java

  JAVA_OPTS: -XX:+TieredCompilation -XX:+UseCompressedOops -Dprogram.name=standalone.bat -Xms1303M -Xmx1303M -XX:MaxPermSize=256M -Djava.net.preferIPv4Stack=tru
e -Djboss.modules.system.pkgs=org.jboss.byteman

===============================================================================

09:57:23,064 INFO  [org.jboss.modules] (main) JBoss Modules version 1.2.2.Final-redhat-1
09:57:23,181 INFO  [org.jboss.msc] (main) JBoss MSC version 1.0.4.GA-redhat-1
09:57:23,221 INFO  [org.jboss.as] (MSC service thread 1-6) JBAS015899: JBoss EAP 6.1.1.GA (AS 7.2.1.Final-redhat-10) starting
09:57:23,855 INFO  [org.xnio] (MSC service thread 1-12) XNIO Version 3.0.7.GA-redhat-1
09:57:23,856 INFO  [org.jboss.as.server] (Controller Boot Thread) JBAS015888: Creating http management service using socket-binding (management-http)
09:57:23,861 INFO  [org.xnio.nio] (MSC service thread 1-12) XNIO NIO Implementation Version 3.0.7.GA-redhat-1
09:57:23,867 INFO  [org.jboss.remoting] (MSC service thread 1-12) JBoss Remoting version 3.2.16.GA-redhat-1
09:57:23,891 INFO  [org.jboss.as.clustering.infinispan] (ServerService Thread Pool -- 29) JBAS010280: Activating Infinispan subsystem.
09:57:23,894 INFO  [org.jboss.as.naming] (ServerService Thread Pool -- 37) JBAS011800: Activating Naming Subsystem
09:57:23,898 INFO  [org.jboss.as.security] (ServerService Thread Pool -- 42) JBAS013171: Activating Security Subsystem
09:57:23,901 INFO  [org.jboss.as.webservices] (ServerService Thread Pool -- 46) JBAS015537: Activating WebServices Extension
09:57:23,914 INFO  [org.jboss.as.jsf] (ServerService Thread Pool -- 35) JBAS012605: Activated the following JSF Implementations: [main, 1.2]
09:57:23,926 INFO  [org.jboss.as.security] (MSC service thread 1-9) JBAS013170: Current PicketBox version=4.0.17.SP2-redhat-2
09:57:23,943 INFO  [org.jboss.as.connector.logging] (MSC service thread 1-10) JBAS010408: Starting JCA Subsystem (IronJacamar 1.0.19.Final-redhat-2)
09:57:23,963 INFO  [org.jboss.as.naming] (MSC service thread 1-14) JBAS011802: Starting Naming Service
09:57:23,975 INFO  [org.jboss.as.mail.extension] (MSC service thread 1-13) JBAS015400: Bound mail session [java:jboss/mail/Default]
09:57:24,012 INFO  [org.jboss.as.connector.subsystems.datasources] (ServerService Thread Pool -- 25) JBAS010403: Deploying JDBC-compliant driver class org.h2.Dr
iver (version 1.3)
09:57:24,095 INFO  [org.jboss.ws.common.management] (MSC service thread 1-16) JBWS022052: Starting JBoss Web Services - Stack CXF Server 4.1.4.Final-redhat-7
09:57:24,240 INFO  [org.jboss.as.server.deployment.scanner] (MSC service thread 1-13) JBAS015012: Started FileSystemDeploymentService for directory C:\Liferay\L
iferayPortal6.1.30\jboss-eap-6.1\standalone\deployments
09:57:25,034 INFO  [org.jboss.as.remoting] (MSC service thread 1-11) JBAS017100: Listening on 127.0.0.1:9999
09:57:25,034 INFO  [org.jboss.as.remoting] (MSC service thread 1-4) JBAS017100: Listening on 127.0.0.1:4447
09:57:25,045 INFO  [org.apache.coyote.http11] (MSC service thread 1-6) JBWEB003001: Coyote HTTP/1.1 initializing on : http-/127.0.0.1:8080
09:57:25,049 INFO  [org.apache.coyote.http11] (MSC service thread 1-6) JBWEB003000: Coyote HTTP/1.1 starting on: http-/127.0.0.1:8080
09:57:25,145 INFO  [org.jboss.as.connector.subsystems.datasources] (MSC service thread 1-15) JBAS010400: Bound data source [java:jboss/datasources/ExampleDS]
09:57:25,211 INFO  [org.jboss.as] (Controller Boot Thread) JBAS015961: Http management interface listening on http://127.0.0.1:9990/management
09:57:25,211 INFO  [org.jboss.as] (Controller Boot Thread) JBAS015951: Admin console listening on http://127.0.0.1:9990
09:57:25,212 INFO  [org.jboss.as] (Controller Boot Thread) JBAS015874: JBoss EAP 6.1.1.GA (AS 7.2.1.Final-redhat-10) started in 2404ms - Started 123 of 177 serv
ices (53 services are passive or on-demand)
At this point you can open your browser and navigate to http://localhost:8080 and JBoss will display the default welcome content.

Check this now to make sure your most basic config works. If you aren't getting this content you should stop now and confirm the previous steps. Check your console output to make sure there aren't any configuration or permission errors.

 You should also make sure your user account was created properly by clicking the "Administration Console" link and giving it the credentials you set up. You should get the server status screen.

Notice the url is actually now http://localhost:9990/. You will be returning to this URL again and again to tweak JBoss's settings.

In the next installment we will be deploying the Liferay portal dependencies and configuring JBoss to run Liferay.

Sunday, December 30, 2012

Fireworks Controller

My brother-in-law puts on a hell of a fireworks show every year for New Years. Last year he upgraded to electronic ignitors so that he could fire them from 50-60 feet away. His system consisted of a 12v battery pack from a PowerWheels(r) car and two planks of wood with several nails punched through each. The nails were each wrapped with a couple turns of speaker wire that ran out to his ignitors, and the other leg came back to a central positive terminal that connected back to the battery. Not super elegant, but very effective and easy to troubleshoot and control.

I decided this year he deserved a better system to trigger his ignitors. So I built him this:

This ignition system has 24 channels or "queues", an internal power supply, and it looks pretty sweet too.

My parts for this build were pretty simple:

  • 1/4" MDF (get 1/8", or use Paneling...the 1/4" MDF has an issue, see below)
  • 24 momentary contact push-buttons
  • 48 LEDs (24 green, 24 red)
  • Key switch
  • SPDT switch (with the red switch cover)
  • 12 speaker terminals (each terminal has hookups for 2 ignitors, using 4 terminals)
  • 12v LED strip from auto-parts store
  • 12v battery
  • Pretty case

First off I started with a blank piece of 1/4" MDF I purchased from Home Depot.This served as the base board for the electronics. I decided on a layout for the controls, and then using my drill press and my eyeballs I put the 24 holes for the push-buttons and then used a hand drill for the LED holes.
At this point my MDF looks like this.

I then used my Dremel tool with a router bit to free hand the slots for the speaker terminal connections. I am not a carpenter, nor to I claim to have any sort of artistic capability...this part is utilitarianism at its best.

It was at this point that I *noticed* my MDF was too thick for the buttons and switches to mount to without modification...so at this point I broke my Dremel back out and cut recesses around EVERY SINGLE button hole to reduce the thickness from 1/4" down to around 1/8". This was where I lost about 2 hours on my build, because these recesses had to be done free-hand, and it generated copious amounts of dust.

I painted the front of the board a brownish color because that is what I had handy. Next time maybe it will be black, or a high gloss silver.


Then I started mounting components. I started with the push-buttons and then the LEDs. The push-buttons had nuts to hold them down, and for the LEDs I just used a touch of super-glue right at the edge and it worked great. The speaker terminals and other switches were very simple to mount. This left me with a very pretty front panel (ignore the fact that I can't measure and things are a bit crooked).
Now I started wiring up the components. There are basically two circuits going on here. A Test Circuit, and a Live/Fire Circuit.

The schematic is pretty simple:
From the primary switch (key-switch) tie in each green LEDs long leg (positive). I used simple jumpers for this. I thought about etching up a PCB for this purpose, and I would if I had a little more time, but for this prototype I just jumped them all together. From the short leg of the green LED I ran the two 470ohm resistors in series, then tied that to the red side of the speaker terminal. I then tied all of the negative speaker terminals together and tied that back to the negative side of the battery.

This may not sound like much but after that step my wiring was getting a little cluttered:

I'm not the best solderer in the world, but I was kind of proud of how well this simple design was manifesting.

I also tied in a 12v LED module into the key ignition so that we could have a little light while hooking the ignitors up, plus it adds a pretty blue glow and also serves as a "power" indicator.

At this point I needed to mount the board in the case, and hook up the battery, and I was in good shape.
Some shots of the finished prototype are below.


If you have any questions or need more information, email me. jamesbradleyharris@gmail.com

Sunday, November 1, 2009

Ghetto Delta Robot

I started building a delta robot a few days ago with the intention of using it as a starting point for a more complex robot down the line. Life has progressively gotten in the way, but I wanted to share my status partly in hopes that it will push me to continue making progress, and also maybe to inspire someone else.

First off, I’m using an Arduino to control the servos. The actual calculations are done in Processing on the PC, and sent over to the Arduino through serial as a set of angles for the servos to hit. Eventually, I’d prefer to send more basic commands (X, Y, and Z) over the serial and have the Arduino do the math to calculate the required angles.

As part of my self-imposed limitations, I’ve decided to keep costs as low as possible, since eventually I will be building 4 more of these to finish out the prototype ground soldier for my future robot army.

SNC00180SNC00185

SNC00182SNC00184

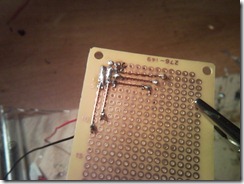
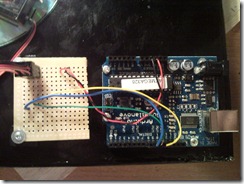
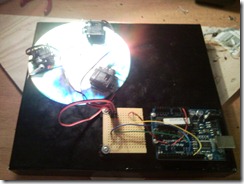
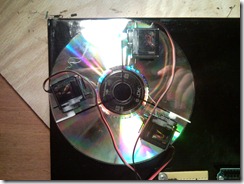
So far I have the servos, Arduino, custom interface board, and wiring in place. The servos are mounted around the perimeter of a CD. I was looking for something rigid, light, and about 5” diameter. It turns out a CD works perfectly, and at a cost of about $.40, it fits into my cheap critera as well.

SNC00189 SNC00192

I’m working out the armature so that I can keep the whole thing light but strong. I’ve gone with 5/64” aluminum wire. This can easily be obtained from (of all sources) ordinary wire coat hangers. This stuff is flexible enough to be easy to work with, but at lengths less than 7” it is strong enough to hold shape against most reasonable stresses. I bent the wire with 3x90deg angles to form a sort of hook, then using a drill I widened the holes in the servo arms to accept the wire. This holds it well enough, but to make sure it didn’t flex laterally while in use, I added small zip-ties to add a little extra security.

Next up I hope to finish the arms, and mount a small plate at the top that will support a stepper motor, worm gear, and some sort of rubber tire.

So far, with the servos and Arduino, my total costs for this project are right around $75. If you got the same (or slightly better) servos online instead of Hobbytown, this could easily be put closer to the $50 mark. I already had the CD, coat hangers, hot glue, wires, solder board, and the various other pieces I needed. I expect to finish this project for less than $100.

I’ll post more as I have time to make progress.

Thursday, October 29, 2009

Blindspot Sensor Work II

New parts! I got two new sensors that are supposed to have a 6.25 m range. I've got two sensors working at the same time. There's some instability in the measurements, but I think that might be a function of driving the Arduino board off the USB cable. It also prevented me from testing the sensors and motor together.


 Brad also came through with an Arduino motor shield, but I'm not quite ready to start soldering to the board. I'm found some Arduino 6 and 8 pin spacers, so I'm going to wait for those to show up before getting started on driving the 2 motors.

I've also started reworking the notification logic. We started with a constant notification logic. Whenever something was in range of the sensor, we would drive the motor. We then increased the motor speed with proximity. This didn't work well in practice. The motor wasn't big enough to give good gradation over the range, and the always on quickly became annoying. It stopped being information.

The new logic plan is to have 3 zones: near, medium, far (and technically a fourth -- out of range). Each zone will have an initial notification pulse, and then a delay. Basically, if an object remains in the same zone or moves to a further zone, we will skip a couple of notification cycles. I didn't get very far on thtat. That's this weekend's project.

Sunday, October 25, 2009

Test Drive I

After driving around a little bit today, I have the following observations:
  1. It WORKS!!!
  2. 3m is not long enough range to give enough warning to do anything. I am looking into some 6.5m sensors with a wider range.
  3. We probably need bigger motor. The signal can get lost in the vibration of the car, especially at the outside edge of the range. 
  4. I'm not sure our test lumbar is going to allow us to differentiate between left-side and right-side inputs. We can certainly put 2 motors in there, but I don't know that the signal will be distinct because it is essentially all 1 foam piece that gets jiggled.
So, not a bad test run. I'm going to get on Sparkfun and see about ordering new parts.

Haptic Blindspot Sensor I

Brad took my idea of a haptic blindspot sensor for the car and started to run with it a couple of weeks ago. Using an Arduino Duemilanove controller board, an ultrasonic sensor with a 3m range, and a little variable speed motor, we were able to prove that we had enough hardware on hand to put together a prototype.

Last night, Brad and I spent about 5 hours working on the first prototype. Brad wired up a car lighter adapter to power the thing. We used 4 wire telephone cable and audio jacks to modularize the 3 parts (sensor, controller/power, and motor). Some parts weren't pretty. (There's probably a better way of cutting the prototype boxes than using a Dremel.) However, we persevered and got something built.


This morning I went by Walmart and found a massaging lumbar support with 3 massage points for about $20. I ripped out one of their motors, put our motor in the housing, and tested. Everything worked.

After that, it was a simple matter of mounting the sensor to under the left rear bumper using some double sided tape. I was able to run the cable behind the bumper. My car happens to have an electrical housing that goes out through the spare tire well. I was able to plug in to an outlet in my cargo space. Everything sits in one of the floor storage compartments.


Now for the first drive!